Sunday, November 22, 2020
Friday, November 20, 2020
Thursday, November 19, 2020
Monday, November 16, 2020
Beginners Blender 3D: Tutorial 26 - Camera Animation Techniques
Excellent tutorial on using camera during animation.
I need it to view around my car while letting people see the beauty of the surroundings.
Sunday, November 15, 2020
HOW TO PAUSE AND STOP BLENDER RENDER (Blender 2.83)
The trick is just to untick overwrite in the output.
My problem was in naming the files. Better method is just to click the explorer buton and use it to go to your output directory. No need to type any name. Typing the name creates problems.
When you accept the folder, the name will end in \ indicating that it is just a directory.
Blender will just use numbers for the names of files. If you write a name, the numbers will be appended to the names that you write.
The video editor is useful. When you add an image, it will give it 25 frames, i.e. 1 second of animation time. I changed it to 50 frames go get 2 seconds for the first image of my 50 frames of animation. I also add another image at the last frame.
In this way, the video pauses for 2 seconds at the first image, before animating for 2 seconds. At the end, it also pauses another 2 seconds.
This gives a more continuous experience than just 2 seconds of animation. Even Youtube starts disturbing the display of the video by overlaying a menu over the replay button.
Reducing render times by 92%! Denoiser showdown
Yes it did reduee my render time a lot. However, as noted in this video, my animation is not smooth.
Not so important to me. I expect people to stop the video and watch the stills.
My settings are:
Render samples: 16,
Denoiser is NVM.
16 is smooth especially the edges. 8 distorts the surface. 4 is clean but distortion is obvious.
For viewing, I use 1 sample only.
Tile size was 128. 256 slows down all my graphic cards, GTX1650X, GTX860M, and QUADRO K2100M.
The transmissions, leave it to 12 until a PC breaks down. My most expensive laptop, the Lenovo Y50-70 crashes a lot, and had to resort to lowering the Lightpaths\Maximum bounces to 8 etc. Then render samples to even 4. Even the Cautics.
The Caustics affect my Transparent Car a lot. If I disabled both, I cannot see inside the transparent skin of the car. But when I only disabled transmission, I still can see. But sometimes, it failed also.
The best option for me is just not use this Y50-70 to render any image but use it to combine the images into a video. Y50-70 is my faster machine but handicapped by 16Gb of RAM.
My desktop PC, despite using an old AMD microprocessor, is equipped with GTX1650S, and is therefore faster in rendering.
A lot of rendering software uses NVIDIA graphic cards. Even MicroCFD uses CUDA, which is why it is not advisable to buy AMD graphics cards.
Wednesday, November 11, 2020
Entering 3D Coordinates using Text
https://en.wikipedia.org/wiki/Wavefront_.obj_file
I prefer to enter coordinates using text editors. The obj format is easy to understand and write.
o is the object name
v is the vertex coordinate
s is the smoothing function
f is a face defined by the vertexes by their occurrence. For a face you need at least 3 faces.
I use it to trace a shape and convert it into a face. This is faster than entering them in blender.
My coordinates come from the shp file used to input to MicroCFD software to calculate drag coefficient.
The simplest contents is:
o suv
v 0 0 0
v 0.195 0.365 0
v 0.2 0.375 0
v 4.5 0 0
s off
f 1 2 3 4 5 6 7 8 9 10 11 12 13 14 15 16 17 18 19 20 21 22 23 24 25
Tuesday, November 10, 2020
Blender Constant Spinning Object or Wheel Blender 2.8
A good explanation but in 2.9, there is channel menu with linear extrapolation. No need to add offset anymore.
The Easiest Tutorial on Making Movie Using Blender
Most of the youtube tutorials on animation are just too difficult. It is actually very easy but they just make them look difficult.
Just go to animation menu. Usually we are at the layout menu. When I first install the latest versions of Blender from 2.8 onwards, there ia an animation window at the bottom corner of the screen.
Just press "I", for insert keyframes and the position, rotation or scale etc. are stored.
You move the blue line to indicate the frame of the movie to another frame location where the object changes location, or rotation etc. Presss "I" again to record the new postion, rotation or scaling.
If there is no change, there will be yellow line from the previous frame and the current frame pointer.
That is all there is to it. Just play the recorder. Software will try to estimate the transitional positions, rotation or scaling between the two frame locations.
It does not matter what display mode you are in. The animation will be carried out.
My mistakes was to set the location before setting the frame. If there was a previous keyframe data located at the frame, it will overide our setup. So it is better to go to the desired fram and then do the move, rotate or scaling.
So theoretically, you just need to record two locations. The first fram and the last frame. I want to animate up to 50 frames only, but good enough for people to see an animation effect.
You must do it object by object. I had 3 objects to animate so I need to store the keyframes 3 times. No problem at all. If we make a mistake, no need to delete the keyframe. Just overide it, by entering "I".
To animate rotation, you only need to do it once. Put your mouse cursor over the dope sheet that appeared automatically when you insert keyframes.
Press T. Interpolation set to linear.
Then channel, extrapolation mode.
The trick to set many wheels all at once is to select all, then set axis of rotations to individual origins. The menu is at the central top, next to snap menu.
Monday, November 9, 2020
Blender 2.83 How To Setup an HDRI Environment Background || Blender Tuto...
Excellent tutorial on setting up HDRI.
Key points:
1. Use Cycles for Render. Cannot use EEVE.
2. Use plane beneath the car to catch shadows.
3. In plane, world properties/visibility, enable shadow catcher.
4. You can rotate your HDRI instead of your model.
Make sure you install addon node wrangler.
In Shading/World, click the HDRL node first and then <ctrl> T
You rotate the HDRL usinn the Mapping node.
Installing 360 degree Panoramic Pictures to Blender (HDRI)
https://hdrihaven.com/hdri/?c=nature&h=venice_sunset
Download the HDRI from the above links. There are many places on earth.
https://www.aifosdesign.se/tutorial-how-to-use-an-hdri-environment-texture-in-blender/
Key steps:
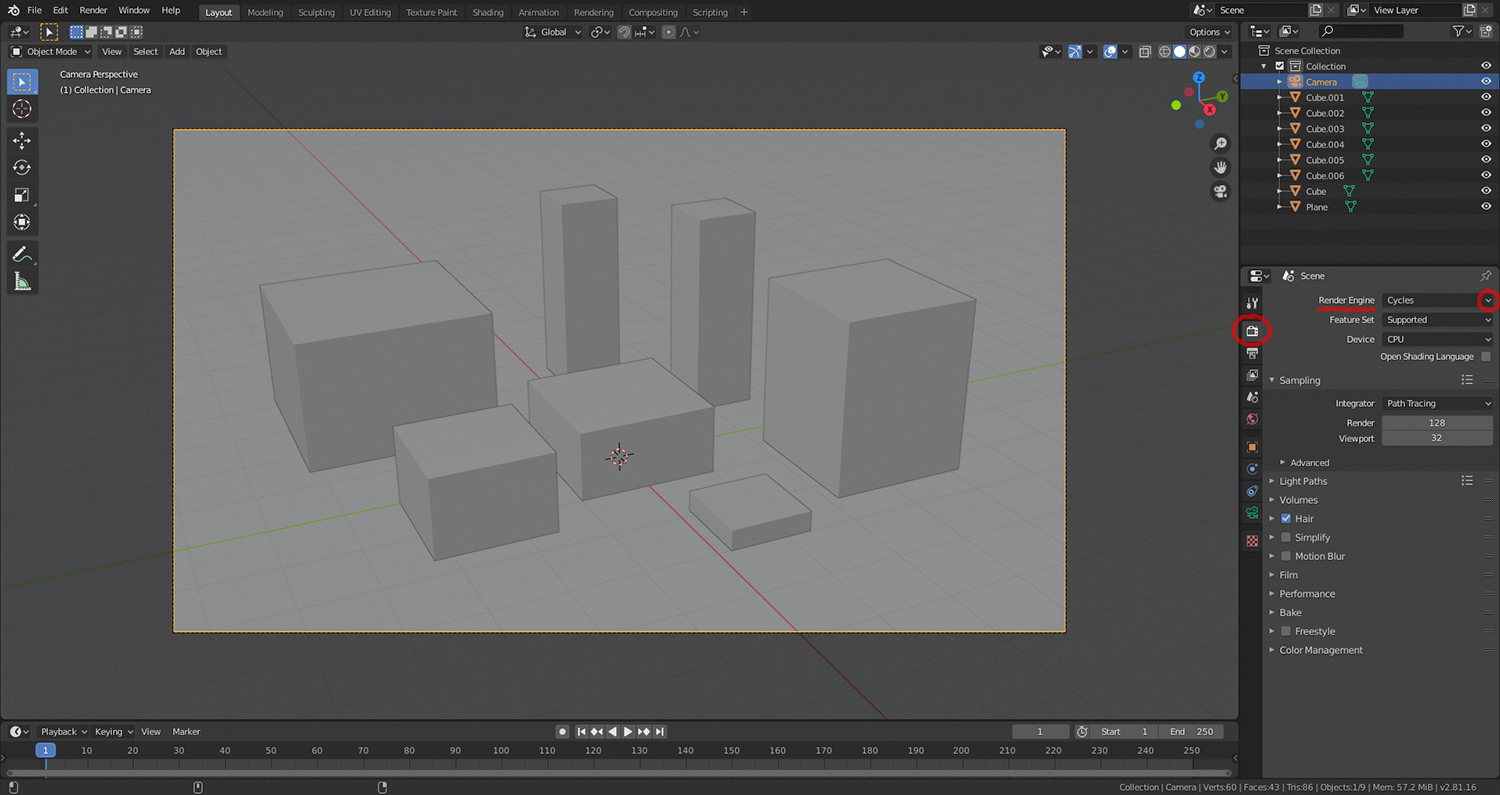
Having made sure that the <Render Engine> is set to [Cycles] in the [Render Properties] (the <Scene> context tab with the camera icon), let us now begin.
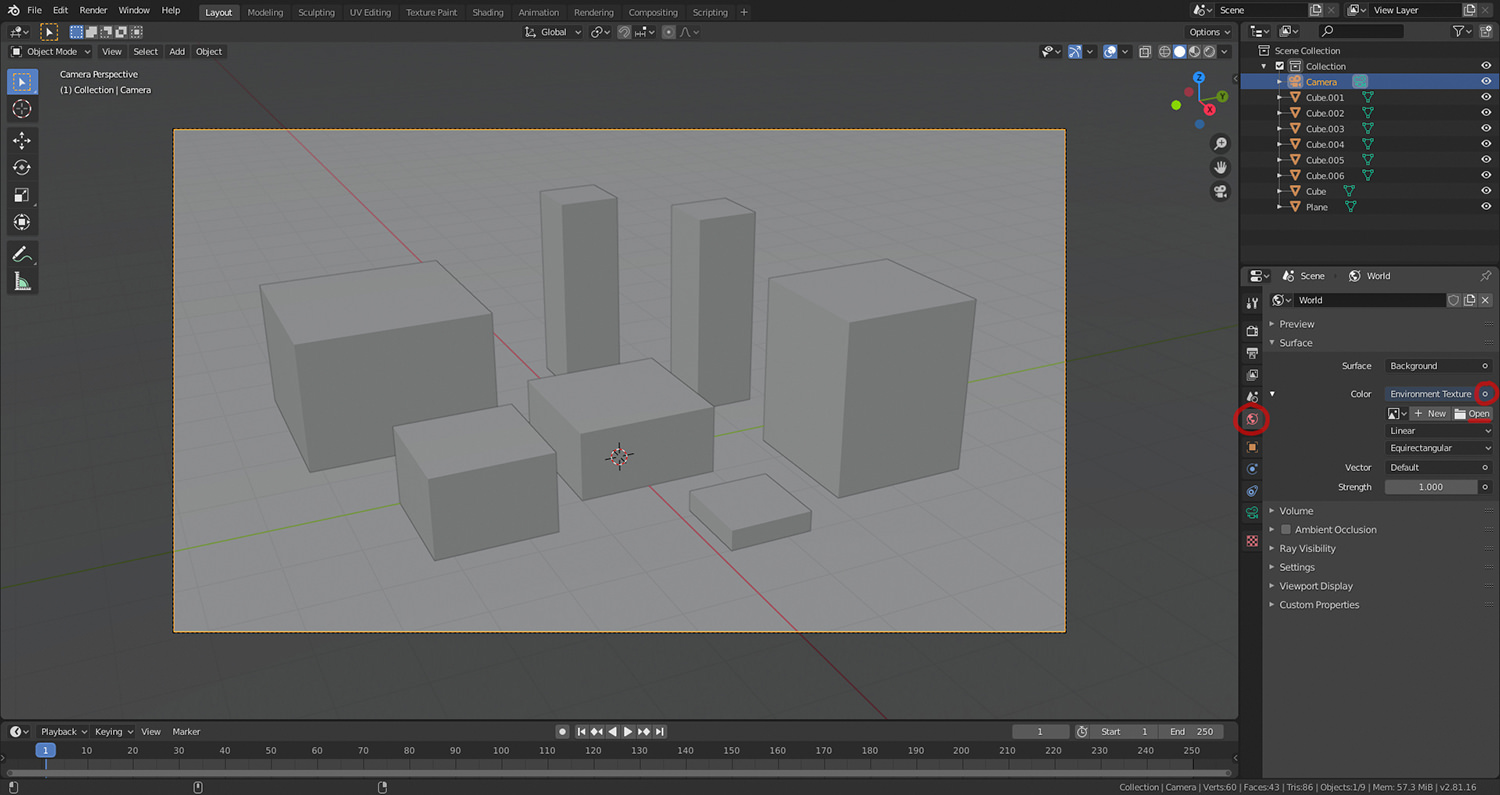
Navigate to [World Properties] (the <Scene> context tab with the red Earth icon).
Click the (large) circle next to <Color>, and select [Environment Texture] (under <Texture> category).
Click [Open] and navigate to or specify the filepath of the HDRI file of your choosing.
Having set the HDRI file (Open Image), change <Viewport Shading> to [Rendered]. This may take a while, depending on the size of the HDRI file. Viewport is the display that you use during editing. You can adjust the displa resolution to be lower than the printed (output) images. For fast editing, use the <Viewport Shadiing> of just wireframes.
You cannot use solid to display the background image. It must be in rendering view.
This short tutorial will guide you how to use any aifosDesign HDRI
to light up your Blender 2.90 scene with accurate, realistic and light
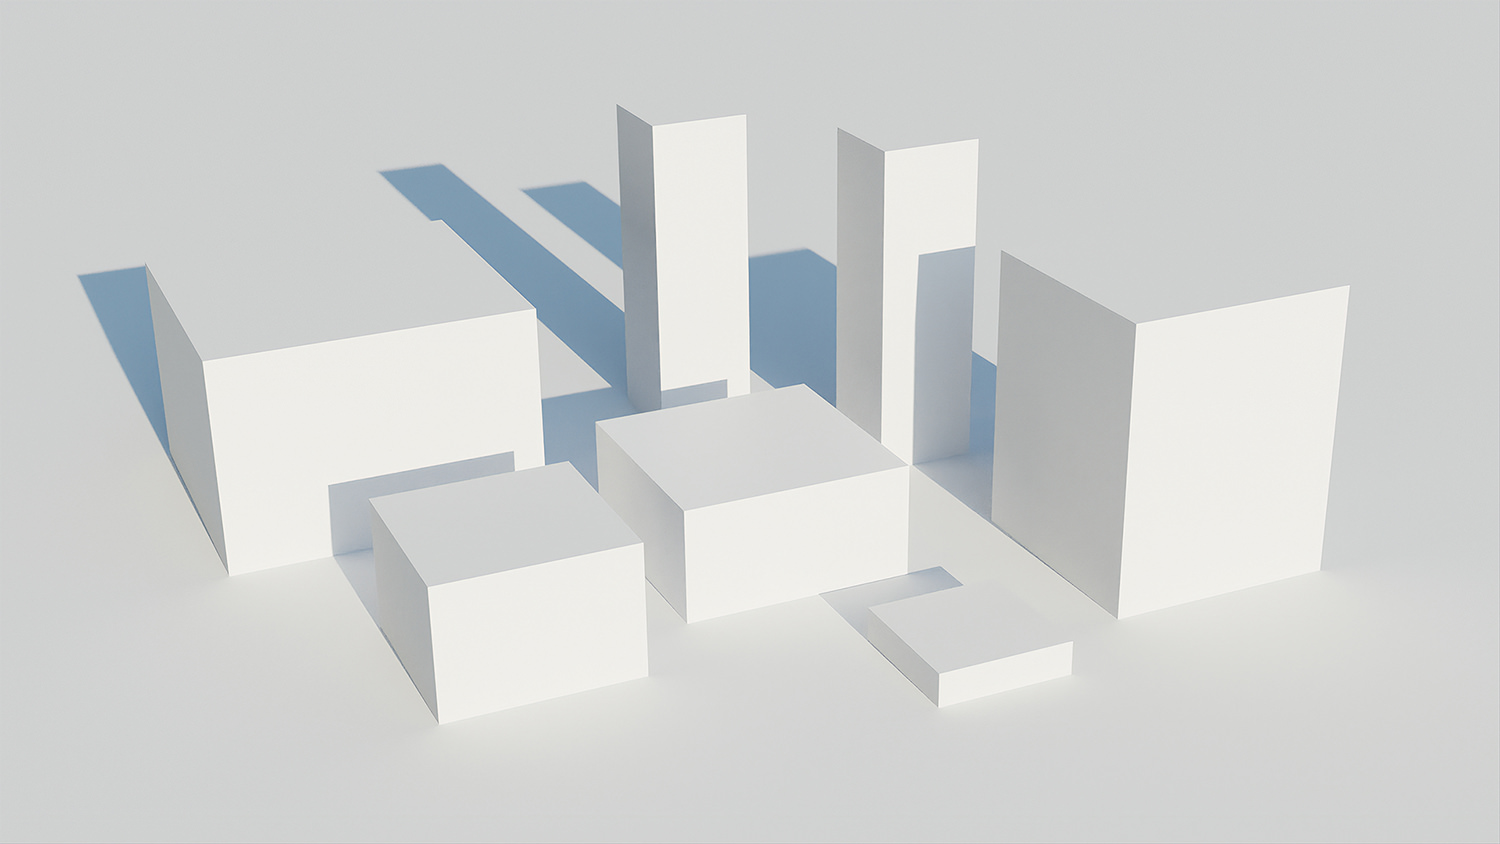
intensity calibrated environments. The above example scene is lit only
by HDRI – Modernist Cottage in Forest (Summer; Early Evening).
Originally created in January 2020 for Blender 2.81, this tutorial has been scrutinized and verified to work with Blender 2.82, as of February 2020. As of June 2020, the same process applies for Blender 2.83. The same is valid for Blender 2.90, as of September 2020.
First, to set things up on our side, we will add (with SHIFT+A) a plane scaled (with S) to extend throughout the viewport, and add some simple cubes of varying non-uniform scale (using X, Y, and Z respectively while scaling to scale along one specific axis, and locking one axis while scaling the others by holding SHIFT and pressing the relevant key) to populate the scene. We press CTRL+ALT+Numpad 0 to align the active camera to the current view, and rotate the camera along the local X axis (by pressing R and then X two times) to contain the point of interest. We delete (with X)
our default point light as well. Your scene will ideally be different,
since the assumption is that you will let the HDRI's realistic lighting
endow one of your creations of more artistic value than this example
scene.
Having made sure that the <Render Engine> is set to [Cycles] in the [Render Properties] (the <Scene> context tab with the camera icon), let us now begin.
Navigate to [World Properties] (the <Scene> context tab with the red Earth icon).
Click the (large) circle next to <Color>, and select [Environment Texture] (under <Texture> category).
Click [Open] and navigate to or specify the filepath of the HDRI file of your choosing.
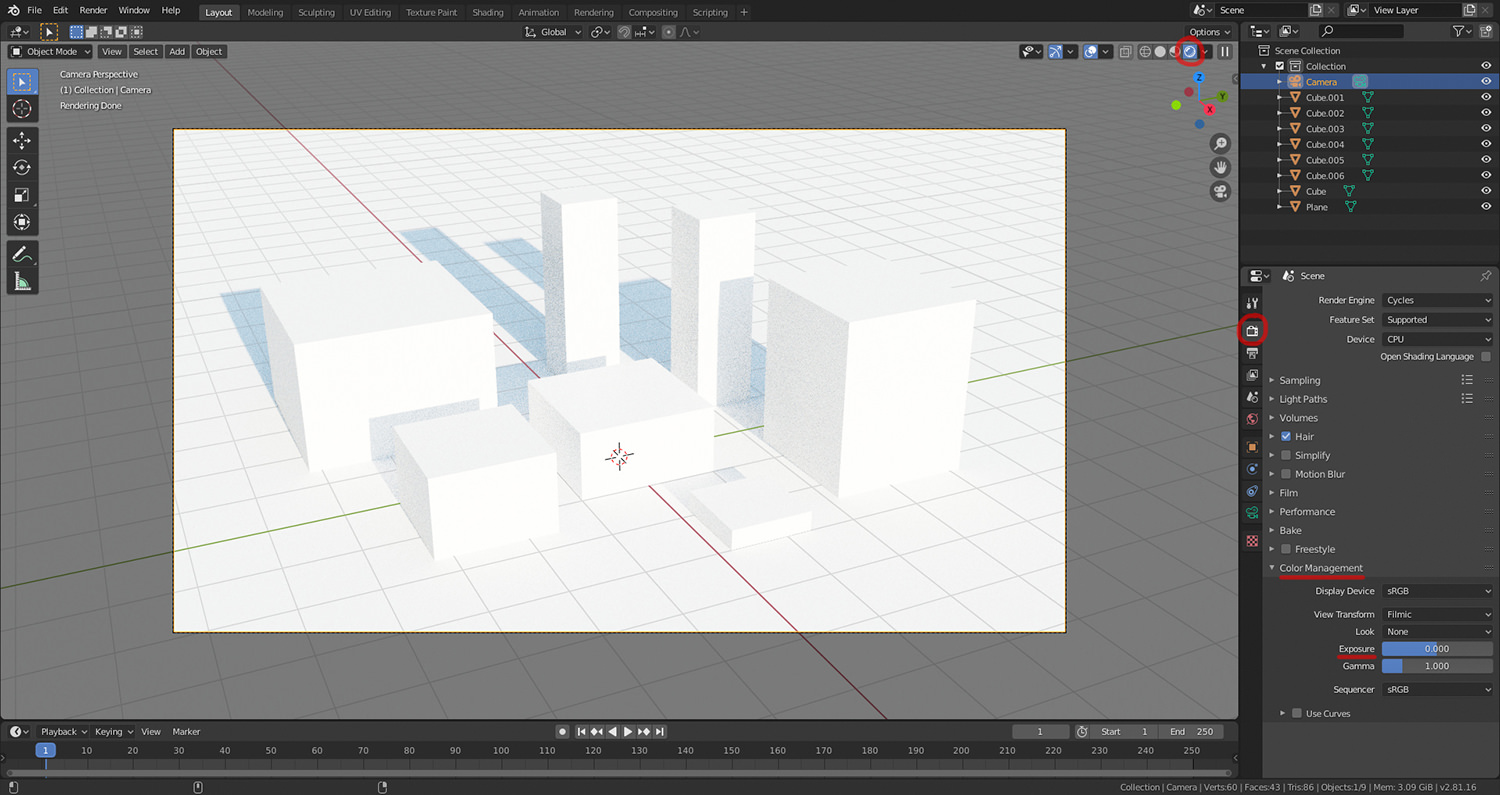
Having set the HDRI file (Open Image), change <Viewport Shading> to [Rendered]. This may take a while, depending on the size of the HDRI file.
Depending on the characteristics of the HDRI, the scene may now appear (sometimes absurdly) over- or underexposed.
This is because all of aifosDesign's HDRIs have been meticulously calibrated to actual light intensity (with EV 9 as the absolute reference point), in contrast to the arbitrary normalization prevalent in other HDRIs, and Blender's camera has implicit exposure settings equivalent to EV 9, which may produce a darker or lighter image than intended.
To properly balance this – since Blender natively lacks physical
camera controls (at least with an effect on exposure) – instead of
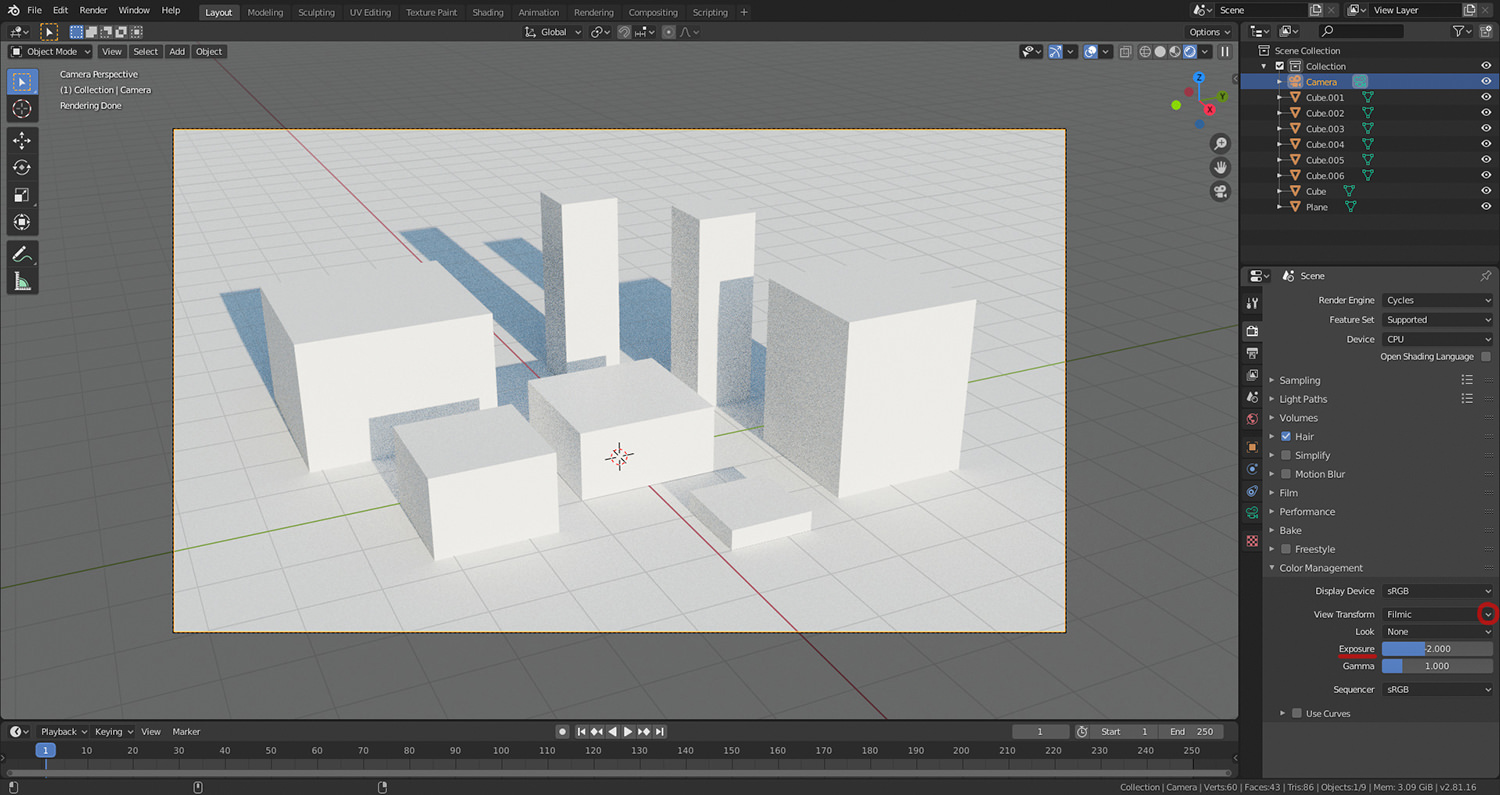
manipulating aperture, ISO and shutter speed, navigate to [Render Properties] (the <Scene> context tab with the camera icon), and under <Color Management>, utilize the <Exposure> slider to achieve visually pleasing/intended results.
Hold the SHIFT key to fine-adjust the slider's value.
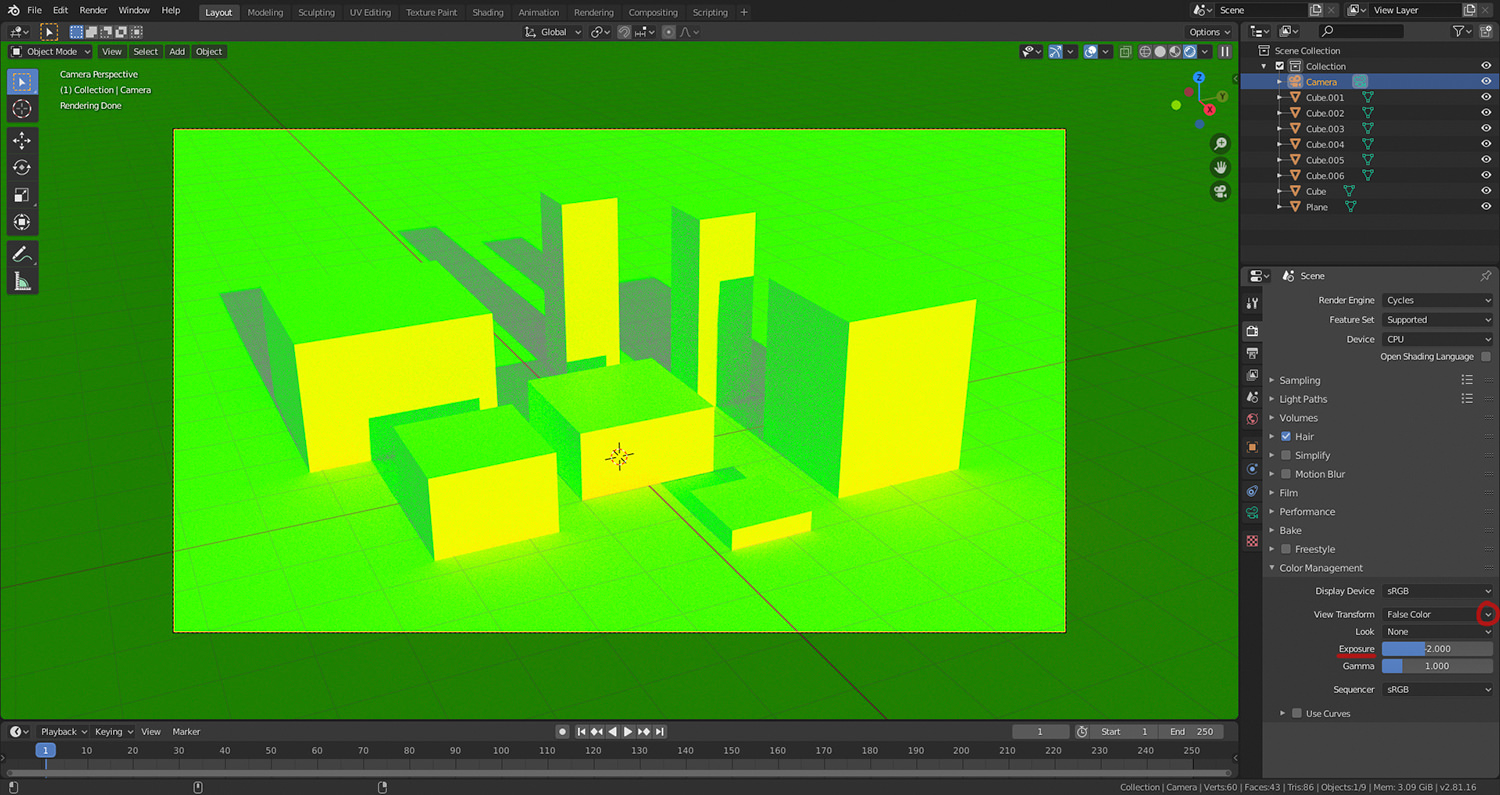
For a more controlled method of balancing exposure, change the <View Transform> from [Filmic] to [False Color], and adjust <Exposure>
with the goal of having points of interest neither underexposed (beyond
cyan) nor overexposed (beyond yellow), with grey corresponding with 18 %
grey in linear colour space (about middle grey in perceptual colour
space) and everything green pertaining to within about 2 EVs over and
under middle grey, respectively.
When you think that the exposure is balanced enough for your artistic vision, switch back to [Filmic], and optionally further fine-tune the exposure, until you are satisfied with the results.
All aifosDesign's HDRIs are delivered with a recommended value for balancing the Exposure value to eye-pleasing levels – found in the attached Read me file or on the product page – however, this is only intended as a starting point for further experimentation into what your artistic desires want to achieve with regards to lighting your scene.
The physical camera equivalent EV can be calculated with EV 9 (Blender's implicit camera default) minus the <Exposure> value in <Color Management>.
If the <Exposure> value is negative, its additive inverse can be added instead, as per basic arithmetic, e.g. 9 - (-2) = 9 + 2.
With an <Exposure> value of -2, per above example, the Blender camera's exposure settings correspond with EV 11.
The major perk of the absolute light intensity calibration paradigm, is that all of aifosDesign's HDRIs can accurately be used for simulated physical camera workflows (i.e. EV-dependent scenes), as well as being more reliable when used interchangeably in conjunction with light objects of static intensity (e.g. street lights of a certain lux or candela, used simultaneously with early evening vs. twilight HDRI).
N.B. If you are using a scene-referred workflow
(e.g. exporting to OpenEXR as linear 32-bit float/16-bit half float,
etc.) and not a display-referred workflow (e.g. exporting to PNG, JPEG,
etc.), it is important to remember that the <Exposure> value in <Color Management>
will not be burnt-in, since it is discarded as a form of
post-processing. However, it is easy enough to restore in any image
manipulation software that can handle linear images, such as GIMP 2.10,
by simply readding (or resubtracting) the same exposure value as was
settled on in Blender.
If any issues persists, please write a comment below, and we will do our best to solve the problem.
Recommended tutorials to continue with:
How to rotate an HDRI environment texture in Blender 2.90
Sunday, November 8, 2020
Tips & Tricks for Blender 2.9 | Duplicate Faces, Vertices and Edges
I use it to separate moveable control surfaces of the Transparent Car.
Excellent 3D File Converters
https://cadexchanger.com/solidworks/solidworks-to-stl
I have tested it to work perfectly. It failed to convert to stl format, but it is able to convert to obj format. Blender can import obj and stl files.
This software is free for evaluation purposes.

